Evolution Traverse Beta and Gear Lists for Summer and Winter

“Penetrating so many secrets, we cease to believe in the unknowable. But there it sits, nevertheless, calmly licking its chops.”
Indeed, there is nothing you can do to eliminate uncertainty on the Evolution Traverse. It’s too big.

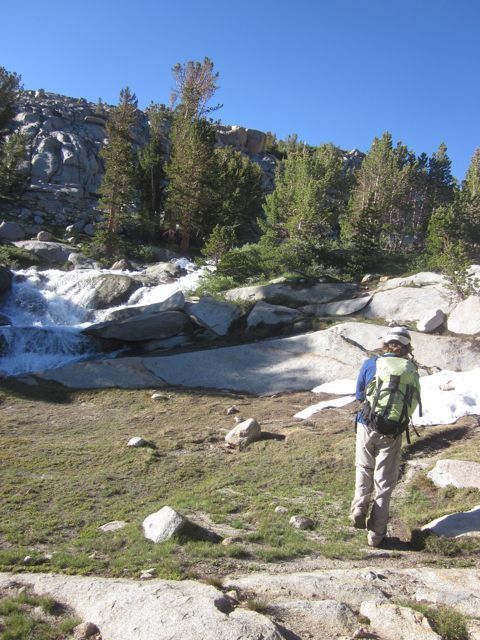
Beautiful skypilot flowers on the ridge from Mendel; Darwin in the distance (July 2011).
In addition to its location in the heart of the Sierra and its size and quality of climbing, Evolution has become something legendary in the way of ridge climbs in America. But even though it’s a major route in the Sierra, and even though Peter Croft lists it as his favorite climb, only 15 or so complete ascents have been documented. 2010 and 2011, the busiest years so far, each saw only four completions. It is really, really good climbing for almost the entire route, in a spectacular natural setting. Yet it is so rarely traveled.
Many don’t try because the route it seems so intimidating. Of those that try, a lot fail on the route, probably because they did not understand its nature when they prepared. Here’s an attempt to keep the air of adventure (I don’t think I can fail on this part) while still trying to provide some useful guidance on preparing for a send of the route.
The Evolution Traverse (go ahead, call it Evo; you guys are going to spend a lot of time together so can get a bit informal) is nominally a rock climbing route, at least in Summer. In Winter, it’s full-on mountaineering, snow, mixed climbing, and gloves primarily.
Skimping on scheduled time--or trying to send the route too fast-- seems to be the most frequent cause of failure (as you can read in many TRs).
Since it’s so big you will choose to go unroped for much of it, meaning mountaineering and soloing experience are most essential. There are no difficult moves--very little above 5.7 and nothing harder than short bits of 5.9, endurance is a major factor. There is a lot of mid and low 5th class climbing, much of it burly, and much of it with exposure.
As the first complete ascent was relatively recently (1999), the only books that I know listing the route are Croft’s guidebook and the 50 Favorites Book. (Though Secor lists parts--and maybe all of it in the 2009 version?)
Those books give good essentials, but not much in the way of strategy or a palatable sense of what’s out there (though Croft’s book, I should mention, is excellent for getting psyched up). Therefore most people, myself included, relied a lot on the Internet to learn about and prepare for the route. And since Internet accounts are pretty varied, I thought I’d try to compile the details of the route in one coherent place.
There is a lot of uncertainty, especially when you compare TRs, many of them about failures, from climbers that seem to be describing radically different routes. We provide just another perspective, not a gospel account. And like the opening Mencken quote above, this route is such that no matter how much you think you know, there will be even more that you don’t know.
To be clear, this post is not trying to be Supertopo for an 8-mile route that’s technical most of the time. We agree with Croft that it would be impossible anyway to give complete beta for such a huge route. And in a different vein, several of the ascencionists seem to like to keep things shrouded in mystery in order to keep the adventure. And I agree with and understand this mentality.
At the same time, I think if people knew a little bit more about the route’s logistics, it would not be prohibitively intimidating while still keeping the adventure. With a decent grasp of the big picture, I bet more people would be willing to get out there and attempt it, especially those unfamiliar with the Sierra. While Evo is hard, it’s not that hard. Give yourself enough time and it’s a very reasonable objective. And the climbing is really good. So more people should be getting out there…
Everyone I know who has done or attempted Evo has emailed a bunch of people asking for beta, so essentially I am opening the door a bit for people who don’t know local climbers. There have been slideshow talks on the climb in Los Angeles and in Boulder. The route is hardly crowded, and it’s so great that I think more information is good at this point. Increasing the stoke about such a great route will encourage more people to get on it.

Skypilots are dead in Winter but otherwise it's even more beautiful.
Gear
Most people do this route with a short rope to rappel, and perhaps climb a few short pitches. Both times I used a 100’ rap cord (static line)-- this was sufficient. If you have any issue leading the few crux sections (5.8 or 5.9 cracks) on a static line, it might not be a good route for you, as there are a lot of pitches of close to that difficulty with no pro and more exposure. A thin dynamic cord might be safer, but it also might not be worth the weight. In any case, don’t bring a full length rope, it’s just extra weight. 100 feet will suffice.
There are currently seven (if I remember correctly) or so rappel stations that seem to be used fairly frequently; these have downclimbs as well. Downclimbing may be more aesthetic; rapping is probably safer and faster both. Up to you. We added three rap stations for our Winter ascent on downclimbs which are done in summer, but were too icy in Winter to be safe. I think it’s reasonable and even better to remove them for summer ascencionists.
In Summer, approach shoes are all that’s recommended. A few spots would benefit from rock shoes, but the consensus seems to be that they’re not worth the weight. I like rock shoes because they make me very confident even unroped, so I don’t mind carrying them.
In Winter, we wore mountaineering boots (Charmoz or equivalent) and brought rock shoes, which were useful on a few stretches that had little snow. In general, the route was quite snow-covered so rock shoes would be used only for cruxy sections, and often only by the leader when we roped up.
Cruxes are short, and we brought only 4 cams (a few of them were link cams) and a handful of nuts, which I don’t think we used. You’ll want some for bail gear though, and some slings/webbing for the same. We soloed most all of the route, roping for a few headwalls and sketchy sections (see Time and Roping up sections for details). In summer we soloed a few of the sections we roped in Winter. Mountaineering boots, conditions, and heavier packs accounted for the differences in decisions.
Snowshoes or preferably skis for the approach in Winter. We used a tent to be able to have shelter from the wind for the stove; in summer bivy sacks would probably be preferred. We also brought crampons and an axe on the route in Winter; they were necessary at points. Icy/ snowy rock, as well as some technical snow climbing that even called for roping up. Ice was minimal and could pretty much be avoided, at least this Winter.

Looking down, atop the 5.6 handcrack on the way to Mendel, Winter 2012.
Clothes
In Summer, it will probably be sunny but can still be breezy, and you’ll likely start at night, so it can be a little chilly. A windbreaker is essential, but nothing heavy. Wear normal Sierra clothes. A helmet is also strongly recommended: it’s a ridge, but with oodles of towers and lots of steep climbing.
In Winter, we wore four layers on top—a shell, synthetic puffy, capilene and base layer. On the bottom fleece, a soft shell, and underwear. You could get away with less, but you’d be pretty cold at the cold times. Wool socks, including when in climbing shoes (so size them big). A balaclava and thick hat, and make sure you have hoods too. Sunglasses worked fine, but goggles might be preferable.
Bailing
Peter Croft did the First Ascent, and is quoted as: “It’s a lost, or it’s kind of an ignored idea, the idea of magnificent failure rather than a mediocre success.”- (fromhere). Go for it, don’t be worried about failure. Even being out there in the Evolution Basin is worth your trip. And the majority of climbs on the route don't end in complete ascents, so you’ve got nothing to lose.
Bailing is feasible from most places on the ridge, though is not necessarily easy until past Peak 13,332. Especially early on the ridge you’ll drop a lot of elevation and it’s kind of annoying. Safe enough if you’re careful of loose rock, and you can do it without many (or likely any, if you choose your gully wisely) rappels. The gullies are very loose though, in the summer. Wear a helmet. Bailing usually is done to the West, which still then necessitates hiking back to the start like you would on the route’s completion. You probably left gear stashed there anyhow.

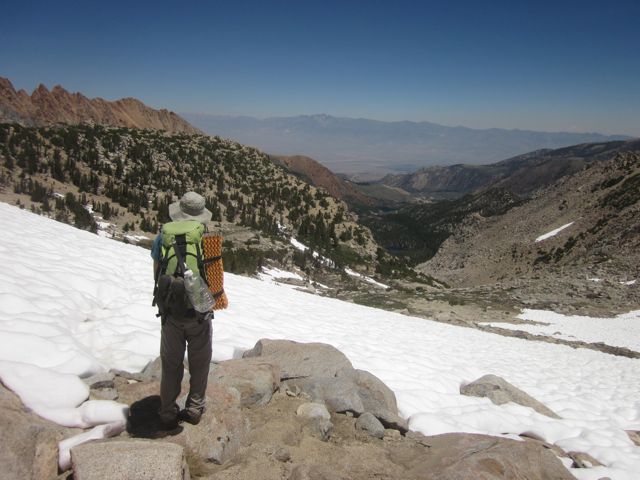
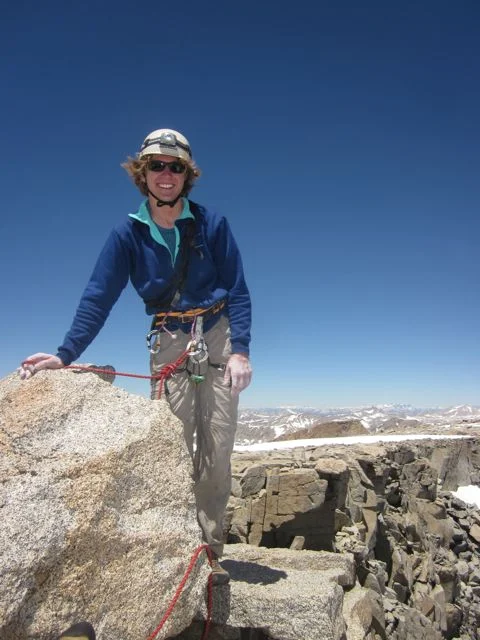
Origin of the Species atop Mt. Darwin, July 2011. In distance Peaks #4 (Peak 13,332) through #7 (Fiske).
Roping up
Croft scouted the route a few times before he soloed it, I believe without a rap cord. Generally people accept the rap cord being used sparingly. People make reference to pitching out some things, but even in Winter conditions we thought only a handful of spots required pitching out. Another couple places (on the knife edge from Darwin) we simulclimbed. I think if you are uncomfortable, roping up for more pitches for safety’s sake is a good idea. We had a block pull and a hold break both, resulting in falls. Luckily both of these happened to be roped (simuling) and no injuries occurred. If we’d been simuling incorrectly, things could have been bad. I think that both falls would have been avoided if unroped as we’d probably check for loose blocks more thoroughly. But then again, maybe a fall would not have been preventable, and the rope saved lives. It's impossible to know what would have happened.
I know of at least two other unroped falls, due to broken holds/pulled blocks on the ridge that resulted in injuries. In many places a fall might result in death, so if a broken hold can cause a fall, test everything carefully and climb methodically, and/or rope up.

Simulclimbing the iconic golden triangle (5.7) between Darwin and Peak 13,332, Winter 2012.
Bivy spots and water
In Winter, no problem, melt snow. In early summer this will also be an option, depending on the snow year. You’ll at least be able to drop off the ridge and find some snow if it’s early enough in the season. Bringing a stove to melt water is more orthodox, and what I have done, but at least four ascencionists have melted snow in a dark bottle or Dromedary bag strapped to the outside of their packs (no stove).
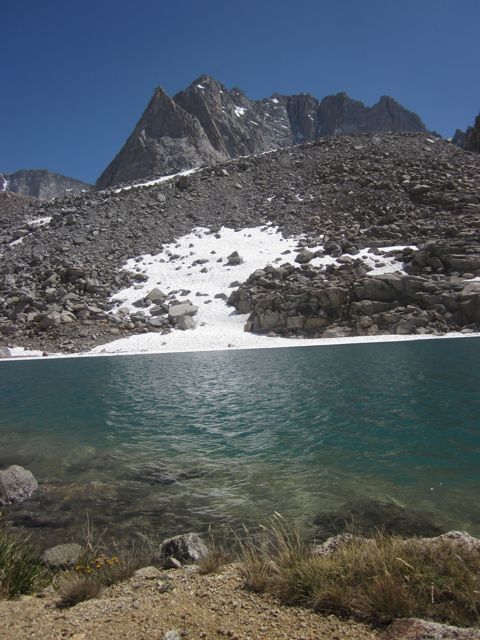
The lake down off the ridge from Haekel col, before Haeckel Peak (#5) is the usual refilling spot, and also the usual bivy spot for two-day climbers. It’s around 60%, maybe 2/3 of the way, time-wise, through the route. So even if you don’t make it here your first day, you might reasonably expect to finish on day two. The route has been finished in a second day from a bivy atop Darwin, though there is no water there. It’s more often required to spend a second bivy if you stop that early. Those are Summer times. In Winter, all those bets are off…
When to go, preparation and similar climbs
I personally think a little snow on the route here and there is not a big problem, so I’d rather go earlier in the season. Exactly how early depends on the snow year; High Sierra season is often thought of as starting July 4 weekend. The FA was in early July. One downside is you might have to carry crampons. Still worth it to not drop off the ridge for snow/water, I think. Most people seem to wait until later (August, September) where there is both little or no snow, but also less daylight. Any season is feasible.
Getting comfortable soloing Sierra granite is probably a good idea if you’re not from the range; other good traverses that will give you a flavor of what you’re in for are Thunderbolt-to-Sill, Matthes Crest, and, perhaps most representative, Temple-Gayley-Sill. Getting some acclimation in any case is also a probably a good idea, as you’ll either be moving very fast, or else sleeping, at 13,000’.

Every time you bivy, you get to see one of these from the ridge (March 2012).
Time
It takes the good part of a day to get in there, and then a grade VI route in summer (2 nights on route for the average party seems to be about standard). Plus the and hike-out. Many good alpine climbers will be able to do the traverse in 2-3 days and car-to-car in 4-5 days safely. Peter Croft did the route proper in 15 hours solo; I don’t know that anyone has gone faster though maybe Alex Honnold did. Some see Croft’s FA in one day and think they can move faster than is reasonable (Croft had been up there multiple times before in order to pull it off). Remember coherence and fatigue are factors as you’ll be soloing most, if not all, of the route to go that fast; an onsight requires lots of mental energy and routefinding.
Doing it in a single push is hard. Most people give it several go’s before they are able to make it happen in a day. Doug Tomzik and I failed on our attempt to onsight solo the thing in a push due to being a little slow (8 hours) at Darwin. Samet and Honnold have onsight soloed in a push, maybe a couple others. Generally single pushers, Croft included, and in fact many of the multi-day ascenders, did some recon before they were successful in their final effort.

Doug, cruising it, July 2011.
In the Winter, it took us four days on the ridge, and a fourth night in Evolution basin before we got back to the base of the route. Including a storm day at base and a day to hike in and out each, this was seven days. I think it could be very reasonably (though no, not easily) done in Winter in five days car-to-car by someone knowing the route and having a good weather window. Or even if you didn’t know it but moved very efficiently and had the logistics dialed. A lot would have to do with Winter conditions that year. It would be pretty difficult to do it in four days car-to-car in Winter, but I’m sure it will be done at some point. One way to bank time would be to get a start on the climb on the hike-in day if you are well acclimated.
Time benchmarks are an area where it’s really hard to get beta, some reports cite one crux or another, or say the difficulty of a particular peak, but “about 5.5 on the way up, 3rd class on the way down.” Grading a peak, or even a pitch, is really not useful at all for predicting how long it will take. How sustained the climbing is is more relevant, in addition to the exposure.
Based on my own experience and on reading multiple TRs, getting from the start of the route to Darwin is 40% of your time. Passing the Croft Golden triangle (about halfway between Darwin and Peak 13,332) is approximately the 50% mark in terms of time. Peak 13,332 (#4) should be definitely past the halfway time mark (the more you’ve roped to this point, the higher percentage of time it will take to reach Peak 13,332). The next couple peaks following Peak 13,332 are very fast and not nearly as technical or sustained, and the last few are a bit technical but not terribly slow either. Project accordingly and adapt on-route.
For summer, Doug and I had the following approximate times, going ropeless on essentially everything but 2 raps and the (supposedly avoidable) ugly 5.9 handcrack:
[Approach time: 5 hours]; Bivy, then 3:30 am start July 25, 2011. Peak 13,360 (Gould): 2 hours; Mendel: 3 hours; Darwin: 2.5 hours.
Those times are good, but not quite good enough to complete it in a single push (and finish in the light), so we bailed from Darwin and swam in Evolution Lake in the afternoon. To single push, we’d need to cut off about an hour from the time, reaching Darwin in around 7 hours. Which would be easily doable on the second try, as several route finding errors alone accounted for that time. But to do the onsight in a single push, you’d have to climb very fast and probably alone. Even when simul-soloing, having a partner is slower as you wait for each other on the cruxes, to eat a snack, etc. Though a partner can provide psyche on this very intimidating route and might increase chances of completion, they do not provide speed. Moonlight and starting early, very early, can help a single push success. But technical climbing begins right after the first peak, so too early of a start may just be wasting time if you get there in the dark.

You can enjoy Evolution Lake and the beauty of Evolution Basin even if you bail...
In the Winter the times were much slower due to dramatically different route conditions (i.e. snow), worse weather, heavier packs, and our party of 3. These following times are climbing times, ignoring bivies in between. Winter times may not be completely comparable to summer times as some things (plunge stepping on snow) can be faster, while generally things will be slower and different depending on the conditions. But I still think they’re useful benchmarks, if only because they indicate the size of what lies ahead. Percentages of the total climb for each peak are fairly similar to what we experienced in the summer. In Winter we roped about 6 pitches plus two little bits of simulclimbing on the ridge after Darwin, and did 10 rappels.
[Approach time: 12 hours] March 7-10, 2012: Peak 13,360 (Gould): 6 hours; Mendel: 6 hours; Darwin: 3 hours; Peak 13,332: 7 hours; Haeckel: 3 hours; Wallace: 1.5 hours; Fiske: 3.5 hours; Warlow: 3 hours; Huxley: 2 hours; Descent to toe of ridge: 1 hour. [return to start of route: 6 hours] [Hike-out time: 6 hours]. Total climbing time 36 hours over 4 days; Total moving time 60 hours (over 7 days, including a storm day)

Our Winter 2012 Bivy spots along the route. You can explore in the route in 3-D from our TR here.
Route Beta
By far, the technical climbing on the route is front-loaded, so the majority of the time is spent on the first half of the route. But the last three peaks also have some significant technical climbing, so save some energy to focus for those.
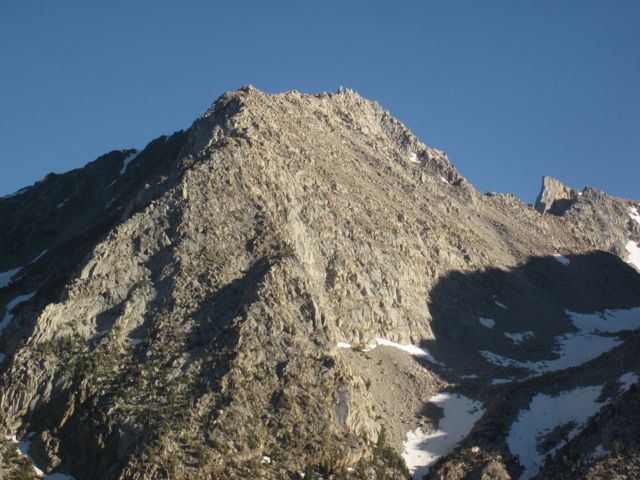
The route starts at the very end of the ridge. Hike-in from the East side over Lamarck Col (12,900’), then drop down and pass five lakes. Drop a bit more elevation over another mile or so to go around to the toe of the route. There is an obvious huge gully above Darwin benches that marks the start of the route. It’s a farther hike-in than you think as you pass many gullies and false peaks of Gould as you hike in. Don’t start in an earlier gully or or you’re cutting off part of the route. You’ll know when you’re there because the ridge disappears into Darwin Benches. Bivy by one of the small ponds/ lakes 15 minutes below the start of the route, or get started right away. Ascend the gully (crampons maybe needed) or the ridge on either side of the Gully--most people seem to opt for the left rock ridge.

Start of the route from Darwin Benches (Summer 2011). Go up the center gully between the subpeaks, or up the ridge to either side of the gully.
Once you hit the first Gould false summit (of maybe 4 or 5), for the rest of the route following the ridge crest, especially in the knife-edge sections, is usually best. Croft says to skirt the first big tower after Gould on the left, this is a tad sketchy but we did it both times and it works. Samet apparently went over the top and thought it was not a good idea. The climbing to Mendel is slow going and not that fun at first-- lots of ups and downs-- but gets better, as does the route as a whole.
Where the ridge is broader, and usually not technical, it is sometimes easier to go a bit to one side or the other. The route to Darwin, after the notch, is even cairned alone the right side and is class 2-3 even though Croft mentions staying on the crest (perhaps he means until that point?). Indeed, you do stay on the crest for the first 2/3 of the way to Darwin. Summit the short Darwin summit block (5.7) and continue down the spine to a few raps. Here, things are kind of tricky—safer to stay on the ridge and not on the loose sand/ scree at the bottom of the solid rock. But it’s quite complex here, the routefinding and technical cruxes of the route. Be creative and careful and you’ll get through. Don’t sweat any wasted time and don’t rush.
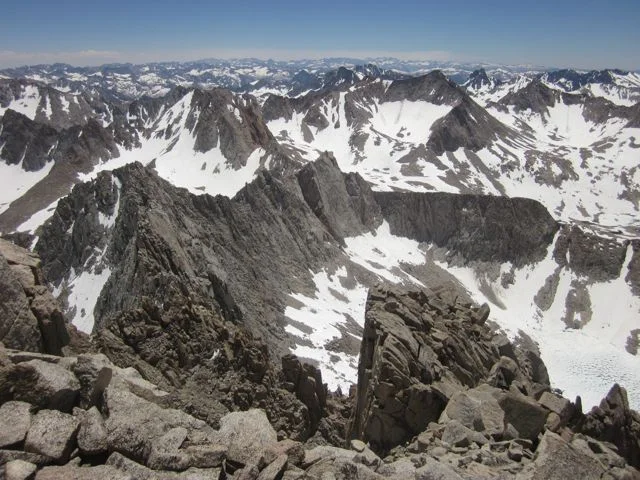
The knife-edge to Peak 13, 332 is the best climbing on the route, in addition to Huxley. Straightforward routefinding, though plenty of mid-5th and harder with knife edge exposure. Be careful of loose rock; we had two blocks pull on this section. There are a decent number of bivy spots along this way as needed, but being a knife-edge, don’t pass one up if it’s getting near sunset…this peak was our slowest one, but once you get there, to Peak 13, 332, it’s smoother sailing.
The section from Peak 13,332 to the notch before the knife-edge halfway to Fiske has very very little 5th class—only a move here or there, and no exposure to speak of. You can cruise this section, routefinding is really however you want it. While Croft and others say there is 5th class on Haeckel (really great climbing) and Wallace, the lack of exposure and minimal amount of it means it’s cruiser. You hit or skirt a couple false summits as you snake your way to Fiske. 5th class climbing returns in earnest on the climb up to the knife-edge halfway on the way to Fiske, which is easy, but loose and late in the route, so you’re tired, there’s big exposure and the rock is not so good, so stay focused. Once you’re to the knife-edge crest, stay on top of it until the ridge again becomes broad and you can go wherever you want. Fiske proper is then class 2-3 up and down. You can mentally check out for a bit.

On the final climb to Huxley (peak #9) , Winter 2012
Another notable deviation from the crest in on peak #8, Warlow. We didn’t notice this (or read) in the Croft description, but he mentions that you don’t follow the crest all the way here (if you do, you’ll probably want to rope). Take the crest for the first triangle tower (fun), and to start the peak (fun for a while), but the climbing is blocky with a lot of loose stuff, and soon turns daunting. At some point (presumably well before the point that we did) you should begin to skirt to the right. Then it’s easy going with not much exposure, though still a bit loose, up to the Warlow summit.
After Warlow, we found it easy and fun to skirt (on the left) the big genderme in the saddle before Huxley. For Huxley itself, we stayed on or near the crest for the most part. Lots of mid-5th and higher climbing in Huxley, but it’s solid at least. Actually probably the most incredible climbing of the route. Huxley is short, just over 13k, so the climb goes quick and is really enjoyable.
Sign the summit register, hoot and holler, then proceed a couple minutes and take the second couloir on your left going North past the summit. Any will work, but that one’s your best bet. The third one also works, but is steeper, stays steep longer, and is pretty loose. Make sure you keep your helmet on…the route officially ends when you clear the gully--you’ve now climbed the Evolution ridge from nothing and back into nothing!
From here make your way back to the start of the route, on the JMT/ PCT if it’s summer, 4 or 5 miles. Cut right on the trail that branches in the trees after evolution lake and heads up to Darwin benches and the start. Then reverse the approach back to your car. In Winter it’s a bit bigger problem as you likely didn’t bring your snowshoes with you on route, so many hours of of knee to waist postholing await you on your way back to your cache at the start of the route. But you don’t care, you just sent Evo!

Pullharder crew on the summit of Huxley, now just the descent to complete the First Winter Ascent
Other good links:
Pullharder’s TR of our First Winter Ascent of Evo is here and my personal thoughts on the send are here.
Pullharder’s Gil Weiss almost completed the route onsight solo in a single push, but elected to keep positive memories of the route rather than suffer and complete the last two peaks without water and in fading light. Some poetic thoughts on the climb are here.
Michelle Peot, who did the first female ascent of the route in Summer 2011, and has given several talks on it, also has a good trip report here.
Pullharder’s Shay Har-Noy and Nate Ricklin have a good summary of the first 3 peaks, here. The TR includes a link to former Climbing Magazine editor Matt Samet’s beta for his solo onsight of the route in a push.
Jed Porter and Alex Few sent the route in Summer 2011 using a rope for a fair amount of the traverse, which is how I would guess most parties will elect to climb the route. Alex’s TR is here, with some beta in the comments as well. And Jed has a summary of all known ascents of Evo through that time here.
There are also other trip reports to be found online, including one with Donini and Lowe. I believe all of these reports can be found at www.google.com.
Below are my pics from summer; our Winter pics can be found here.